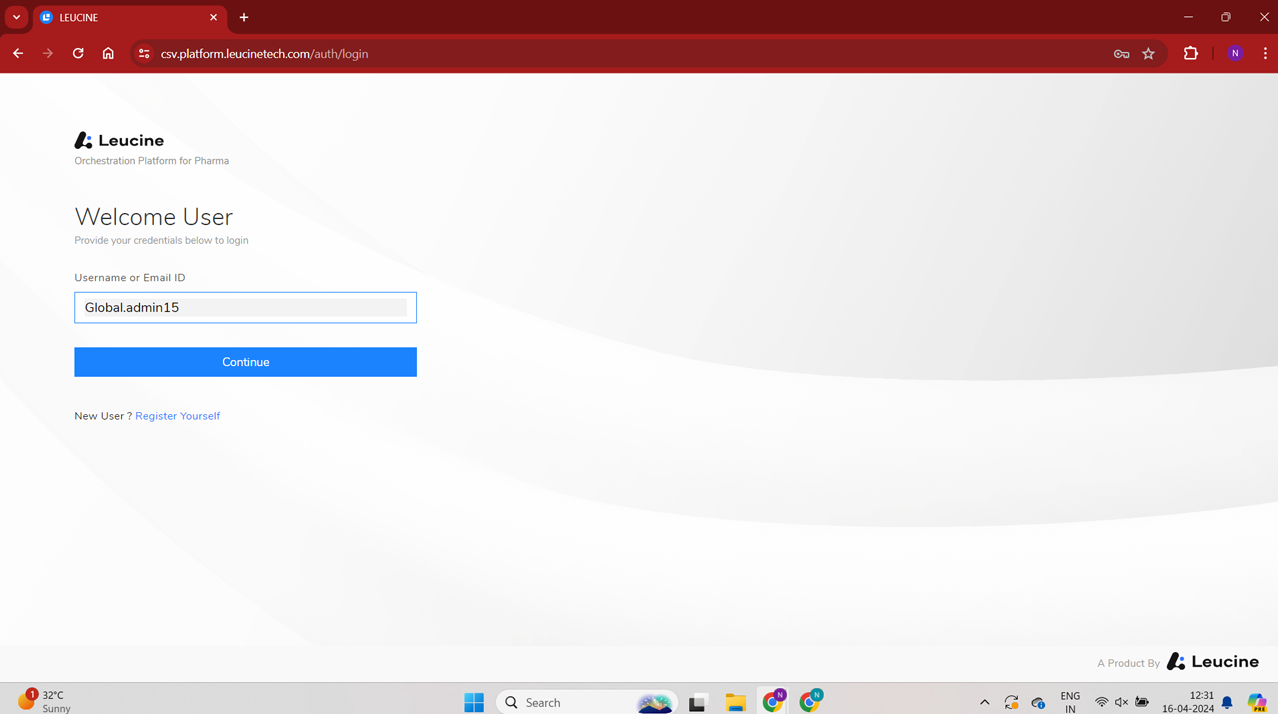
- Log into your account.
- Navigate to the Process tab on the dashboard.
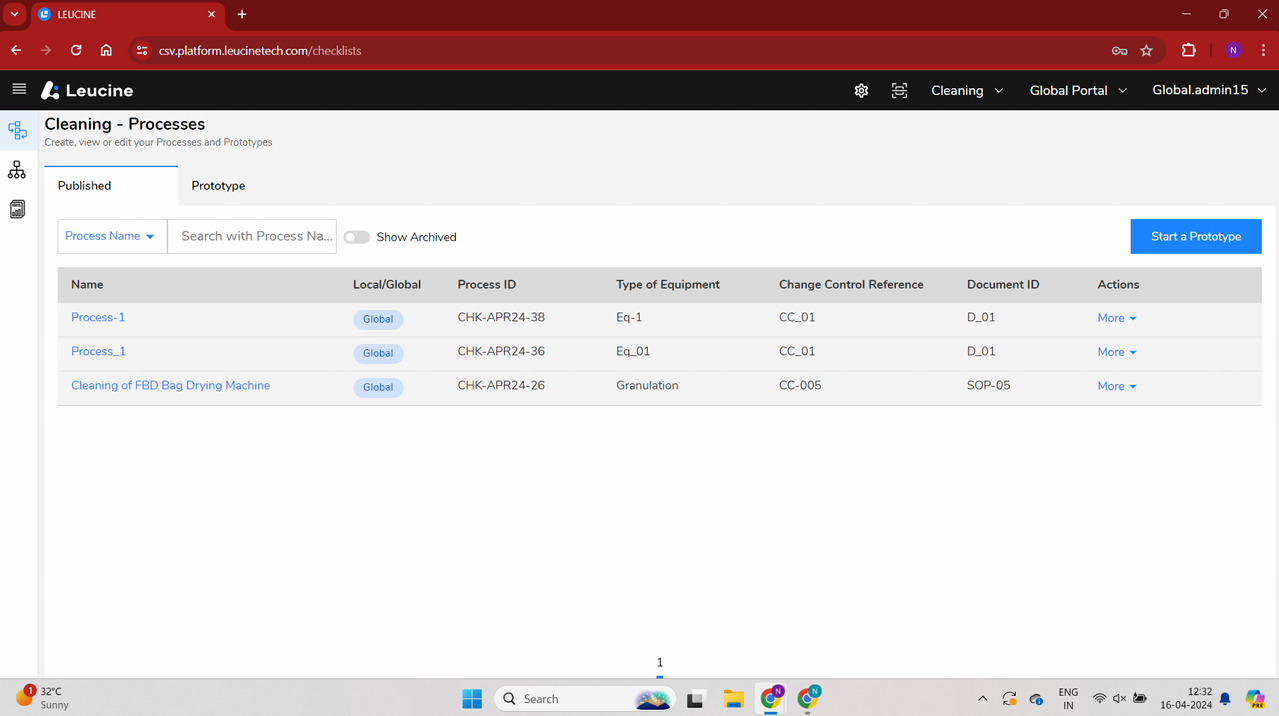
- Locate and select the process that has completed jobs.

- Click on the 'More' button associated with the selected process.

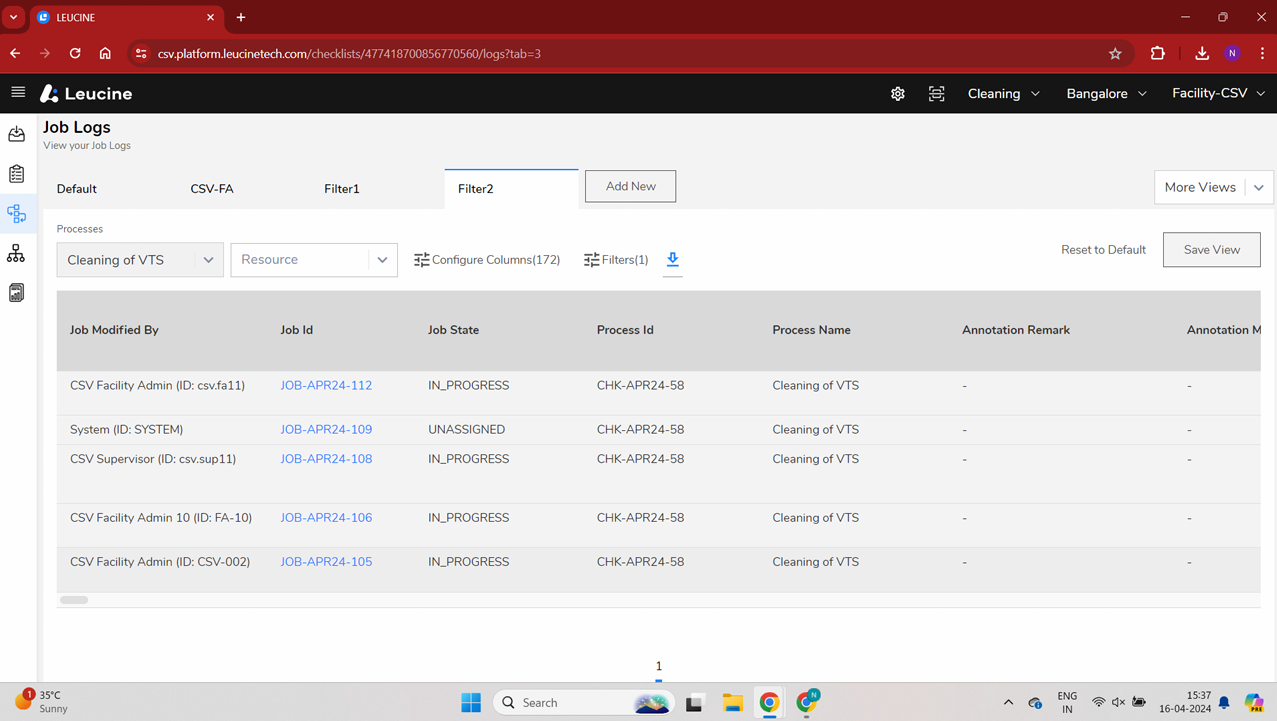
- Select 'Job Logs' from the drop-down menu.
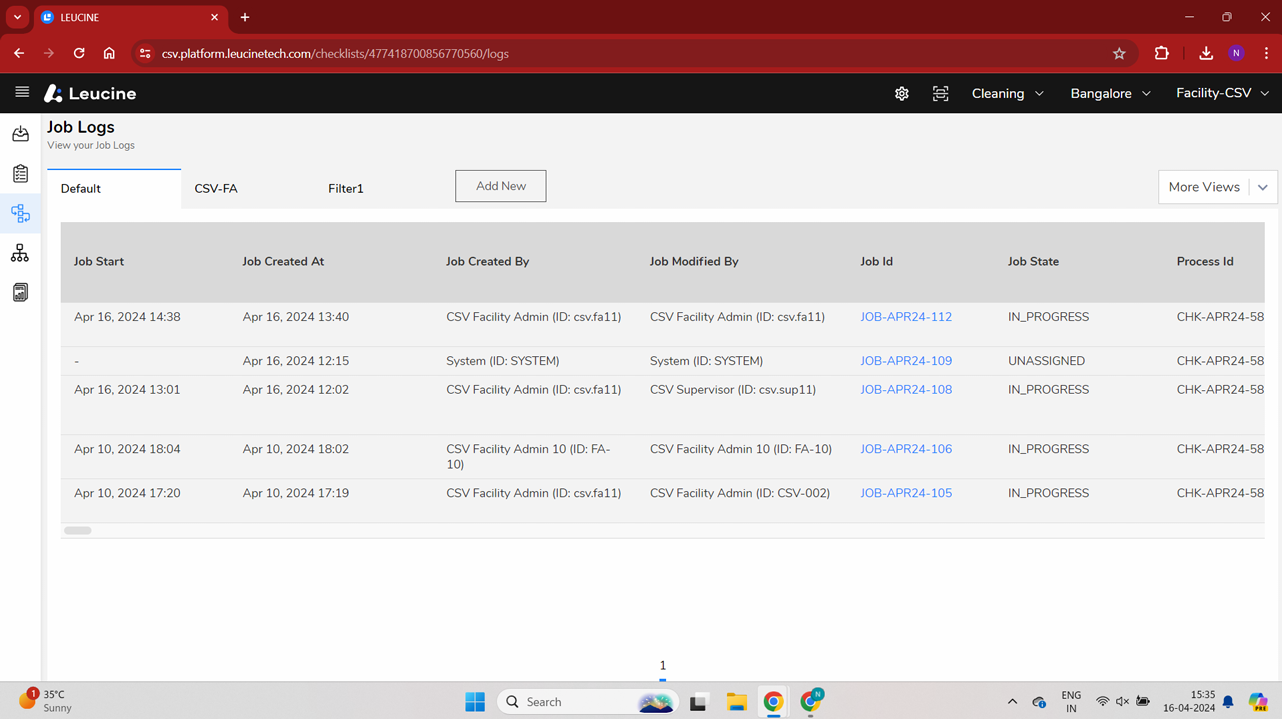
- In the Job Logs view, click on the 'Add New' button to create a new view configuration.
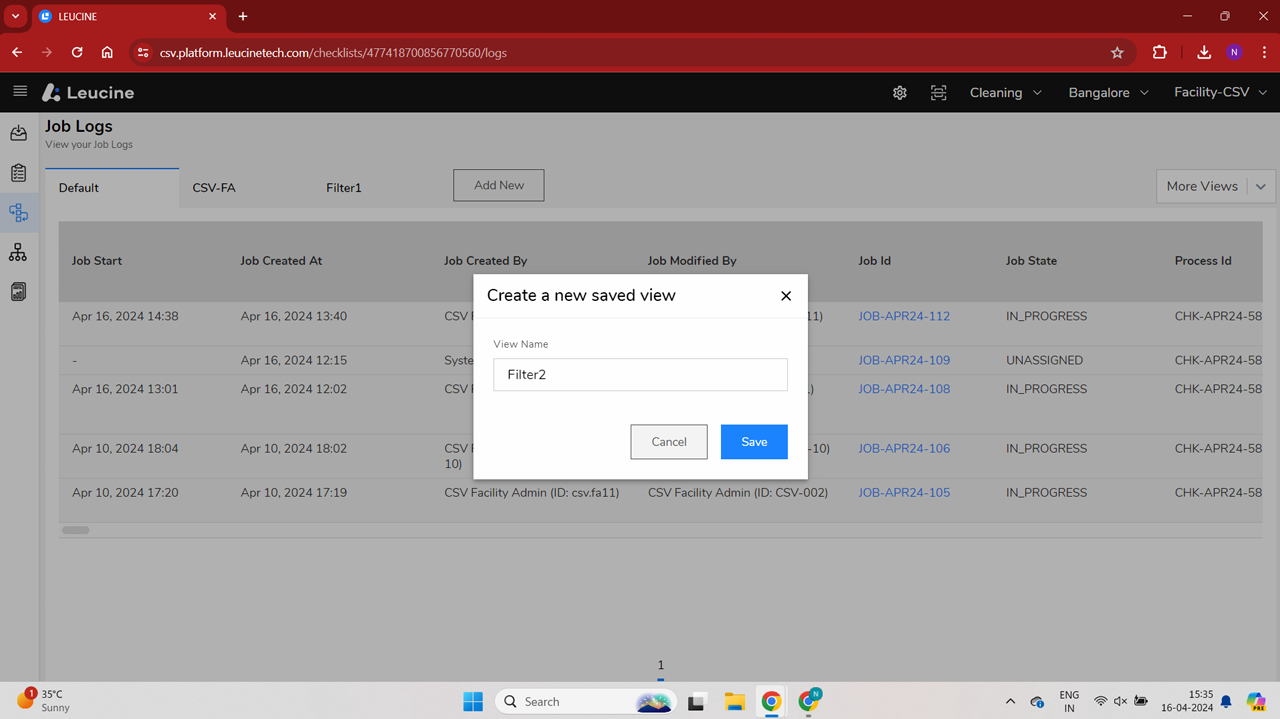
- Enter a name for your new view in the prompted field.

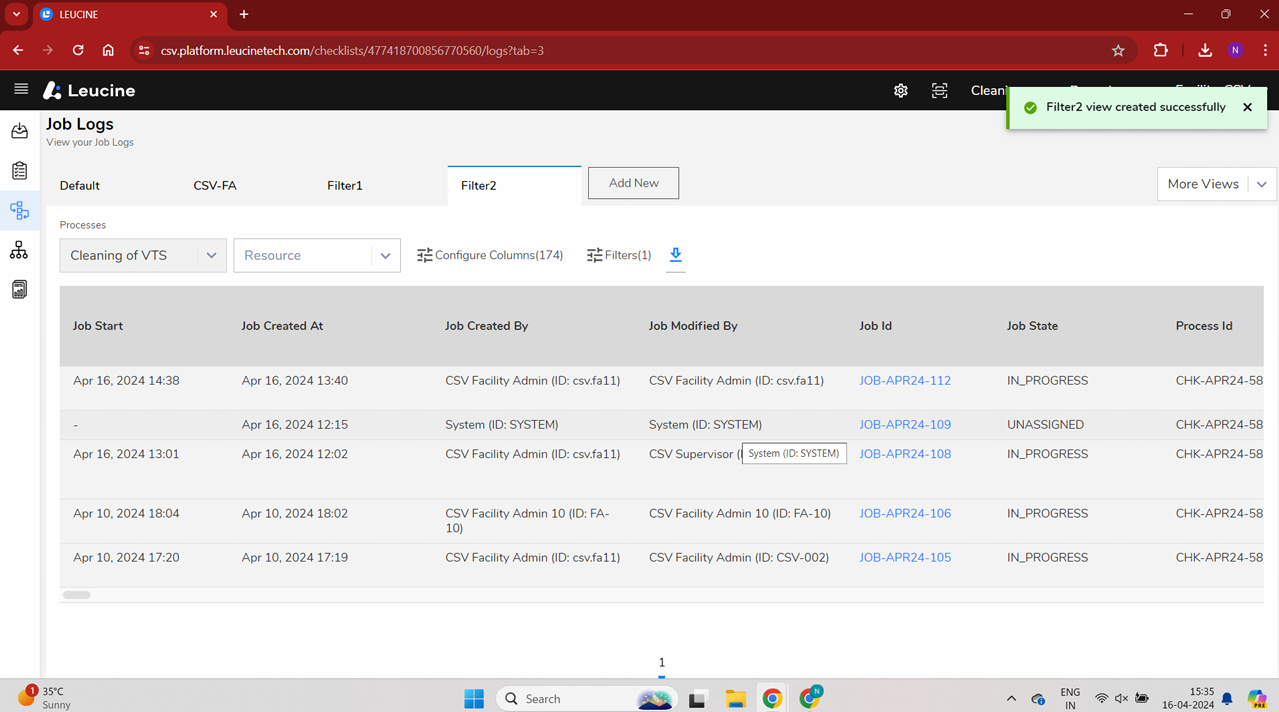
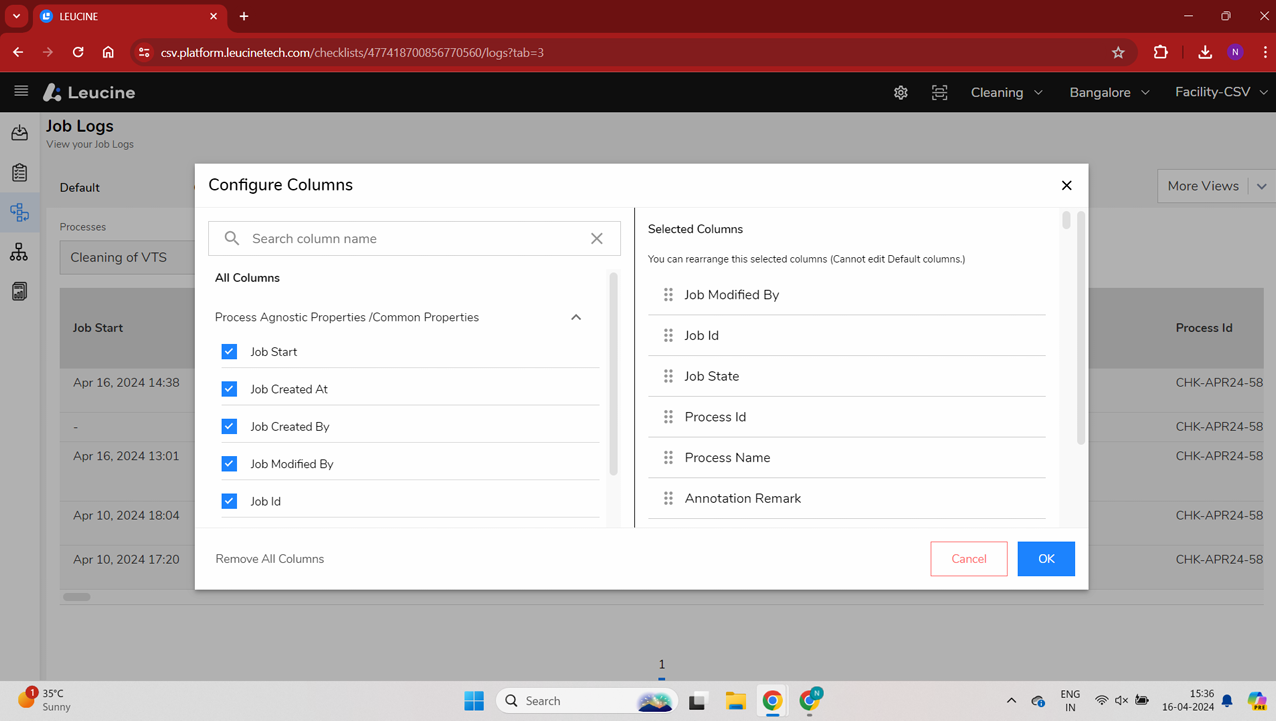
- Choose and configure the columns you want to be displayed in your job logs.
- Once you have selected and arranged the columns as needed, click on the 'Save' button to save your custom view.